Monday, June 28, 2010

Prost Step 3: Quilting Your Placemats

This week we will add batting and batting to our placemat fronts in preparation to quilt. We will also do the actual quilting.

first

Cut 4 pieces of batting that are several inches larger than your placemat fronts.

second

Cut 4 pieces of solid (or print if you choose) 18" x 18" for placemat backs. Fold selvedge to selvedge - two may be cut at a time this way. Cut the width.

Then, trim the selvedge.

Finally, cut the remaining length off to 18". Don't worry about being precise; the placemat will be trimmed and squared at the end of the project. As long as the backing is larger than the front, you should be fine.


third

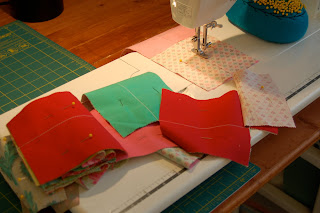
Layer your placemat by first placing the batting on top of the backing, and second by placing the pieced top on the batting.

fourth

Draw your center line from top to bottom for quilting using disappearing ink marking pen. Do this by measuring 2.75" from one of the center solid panel seams. This is where we will begin our quilting and will use the sewing machine foot to "measure" the rest of the lines.

fifth

Safety pin through all three layers. A fist length of space is the maximum between each pin.

sixth

Stitch down the center line. Then, working your way right to the edge, sew one "foot" length away from the previous line. Then, work your way from the center line left doing the same. Here is where you can opt to use a coordinating colored thread. Tip: Hold up the ric rac when you get to that part so you can easily sew along the seam under it. Careful your fingers don't get too close to the needle!

seventh

Trim the back and binding excess and square your placemat. Repeat for the remaining placemats in the set.

Next week, we will add binding and finish our placemats!

Sunday, June 27, 2010

You've Been on My Mind


Truly meant to put out a few more posts this week, but, alas, real life got in the way. Again. :-)

Taking a vacation day Friday made this a 3-day weekend. I stayed up past my bedtime Friday and Saturday night to sew and managed to complete the back of 2 quilts (more to come on that later). It's such a relief to have these finished. Now all I have to do before quilting is finish those pesky leaders for my quilt rack and I will make good on my promise to have one of these quilts done by the time I podcast again next Sunday. Yeah!

Saturday, my mom and I took a day trip to Waynesville, OH - home to The Fabric Shack. I made several purchases.

-1 yard of Kona Snow (I know... I just bought 7 yards but I was short for one of the quilt backs)
-2 yards of Kona Bleach White
-1/3 yard of Sentimental Studios for Moda (from the remnant pile!)
-2 fat quarters of Michael Miller

I also found a yard of antique pink crocheted trim for 50 cents from an antique dealer. Very pleased with this find. Not sure what I'm going to use it for. The right project will come along someday...

In between craziness this week, I managed to complete my first block in the Designer Mystery Block of the Month Christmas Quilt from Fat Quarter Shop. I LOVE the finished product. Super fun pattern and loving the fabrics.


Look for week 3 of Prost tutorial to be up tomorrow. Looking forward to seeing photos of your finished projects on our Flickr group!

Sunday, June 20, 2010

Prost Step 2: Assembling Placemat Fronts

The pieced part of this project is almost finished! This week, we are going to add the solid strips to the front of the placemats and sew in ric rack.

first

Prepare solid fabric to cut by pressing.

Cut FOUR 6"x16.25" strips
Cut EIGHT 2" x 16.25" strips

Folding so selvedge edges are together, cut TWO 6" strips.

Trim selvedge edges.

Cut each strip into TWO 16.25" long by 6" wide strips. You should now have FOUR 6" x 16.25" strips.

Folding so selvedge edges are together, cut FOUR 2" strips.

Trim selvedge edges.

Cut each strip into TWO 16.25" long by 2" wide strips. You should now have FOUR 2" x 16.25" strips.

Each placemat should now have TWO pieced-charm strips, ONE 6" wide solid, and TWO 2" wide solids.


second

Lay your ric rac on a rotary mat and measure 16.5". Cut EIGHT 16.5" ric rack strips. There will be TWO strips per placemat.


third

Line up one strip of ric rac along right side of one of the 2" strips. Place a pieced charm strip over and pin. Take care to line up the edges.


Repeat on the left side of the other 2" strip, laying the ric rac along the edge and placing a pieced charm strip over. Pin in place.


fourth

Stitch a straight seam along the pined edge. Press open. The ric rac should lay on the solid, not the pieced charm strip. Do this for all placemats.


fifth

Pin the 6" wide solid strip to the pieced charm strip on the left right sides together. Stitch a straight seam. Press open.

Pin the charm strip on the right to the other side of the 6" solid piece. Stitch a straight seam. Press open.


Repeat for all placemats.

sixth

Square up your placemat fronts.


Next week we will prepare our placemats for quilting.


stash resolution episode 8

in progress

zig zag quilt
nine patch lattice quilt
Rainbow Around the Block

Knit Picks Shine Sport in Cream
Trendsetters Cha Cha
Link
Fat Quarter Shoppe Christmas Quilt BOM
Kate Spain fabric

the stash report

35.5 yards
+5 yards (backing for Christmas quilt)
+2 yards (finishing kit for Christmas quilt)

-0 yards out

=42.5 yards in stash

bad stitches happen to good people
banner blues

tip
why you should buy more solids

topic: magazine review
Better Homes & Gardens Quilts & More
Jaybird Quilts

Friday, June 18, 2010

The Start of Beautiful Somethings - Cha Cha Cha

I have done a lot of starting recently - and not nearly the finishing I SHOULD do... Oh, well. I spend all day doing the shoulds. Crafting is where I can do the wants, right?

Anyway, here is the start of my Cha Cha scarf. Yarn is Trendsetters Cha Cha in 421 Olive. Love what a fun, quick knit this is. Cast on 12 stitches and using 10 needles. The ruffle affect is achieved by knitting in between the boxes along the ribbon and twisting the yarn when knitting it. There's a great You Tube video Jimmy Beans Wool put out that I used to learn how to work with this fiber.


Here's a sneak peak at my new pattern using Martinique by 3 Sisters for Moda. Early days in the design process. Let's see if my vision becomes reality. More than likely, I'll have to adjust along the way. That's the beauty of the creative process, after all, right?


Finally, if you've ever wondered what 7 yards of fabric folded looks like, wonder no more. Behold, Kona Snow.


Loving the new Knit Picks catalog. Check it out online. I'd love to make the English Garden Socks for all Seasons on page 16.

Enjoy this summer weekend. Looking forward to putting out a new podcast on Sunday! "Talk" to you then, my friends.

Tuesday, June 15, 2010

Block Party!


I mentioned in episode 7 of my podcast that I was considering buying into the Fat Quarter Shop's Designer Mystery Block of the Month club. Well, I took the plunge and my first lovely package arrived yesterday.

In it contained my backing fabric, finishing fabric for the top, and the first block. The fabric is just so cute - 12 Days of Christmas by Kate Spain for Moda.

Since designing my own patterns recently, following someone else's directions is a welcome relief. I cannot wait to cut into this fabric and get started!


Monday, June 14, 2010

Prost Step One: Piecing Charms

first

Separate your charms into color families, such as pinks, greens, and browns. Or you can choose to separate into lights and darks. Mine are by color.


If any of your charms are very close to the same color you are using as a solid, you'll want to remove those from use in this project. Otherwise, you'll get too much of a blend between them. For instance, I eliminated several of the white background charms because I am using Kona Snow as my solid.


second

Pair charms in sets of 2 and place rights sides together. Try to not put two from the same separated color or light/dark piled together. Instead, pick from different piles to create variety.


third

One pair at a time, place your charm "couples" and make sure one is lined up perfectly on top of the other. Place on a rotary cutting mat, squaring the top and left sides to inch marks. Place a ruler at the 2.5" mark from the top to the bottom of the charm and draw a line. You now have a line going down the center of your charm.

Next, draw a line 1/4" from the center line to BOTH the right and the left of the center line. Now you have THREE lines going down your charm. Carefully pin your charm if you prefer to pin your pieces to the right and left of the lines. Do this for all charm "couples."


fourth

Stitch a straight line along each of the lines to the left and right of the center line. To cut time, chain stitch your charms. Chain stitch by stitching to the right of each charm couple center line without cutting the thread in between. Then, flip the all charm couples chained together around to stitch to the left of the center line. When finished stitching all together, snip the connecting threads between each charm couple.


fifth

Line ruler on the center line of each charm couple and rotary cut. Press open pieced charms.


sixth

Separate the pieced charms into sets of 8. Try to not repeat a combination within the same set. Arrange the pieced charms into stacked rows of 4, side-by-side. Try to not have the same fabric next to each other.


seventh

Sew the pieced charm rows of 4 together. Press open.


eighth

Square up each strip of pieced charm rows.


That's it for this week! Next week, we will add the assemble the fronts of the placemats. See you then!

Sunday, June 13, 2010

Tula Pink Charm Pack Winner Announcement

Thank you to all who participated in the Tula Pink charm pack give away. We had 94 entries! Many thanks also to Jaybird Quilts for helping to get the word out.

Now, without further ado, here the winner of the charm pack is...

True Random Number Generator 6 Powered by RANDOM.ORG

Congratulations Hollie Lobosky! Her comment was...

Great giveaway! Thanks!

Hollie - I'll send you an email to arrange mailing.

In the interest of full disclosure, most people did not email me a summary of how they entered. So, I took all the emails I received and entered them in an Excel spreadsheet, starting in row 1. Then, I listed all of the blog comments in the Excel spreadsheet too. Since it was difficult to match email address and profile names on the posts, people who sent me an email were entered a 4th time. Sorry if this seems unfair - this is my first giveaway and will know better for next time. Thanks for your understanding.

Check back tomorrow for Step 1 of our tutorial!

Monday, June 7, 2010

Prost: Supplies


Prost is the German word for "cheers." My husband and I were lucky enough to live with a German family in Bavaria for a week when we were first married. Some of our fondest memories of that journey are slow meals gathered around the dinner table with our host family. Through the language barrier, a tap of the glass to wish good health and happiness translated without the need for words. This project is inspired by those wonderful times we had in this foreign land and the reminder to take the time to meet at the dinner table and share good times here too.


Project makes four 17"w x 15.5"h placemats.

All seams are 1/4".


Supplies:
1 Charm Packs (I'm using Moda Plume by Tula Pink.)
3 Yards of Kona Cotton (I'm using Snow)
4 Yards of Ric Rac (Mine is about 7/8" wide.)

neutral colored thread to piece
coordinating thread to quilt (opt.)
straight pins
safety pins
low-loft batting (I'm using poly-fil cotton classic)
disappearing ink marking pen

I'll post an update each week showing the next step in the process. The whole project will take us through 4 weeks. Join in the fun, and be sure to post your progress and finished projects in our Flickr group!

GIVE AWAY!

To celebrate the launch of my first tutorial, I'm giving away a charm pack of Moda Plume by Tula Pink! Winner will be selected by a random number generator.

Three ways to enter:
1) Leave a comment on this post. One per person, please.
3) Link to this blog from your blog.

Please email a summary of how you have entered to win. stashresolution@yahoo.com.

Deadline to Enter: Saturday, June 12

Winner Announced: Sunday, June 13

Good luck!